Guide to Medical Fiber Probe Assembly
Jul 10, 2025
1. What Is a Medical Fiber Probe Assembly?
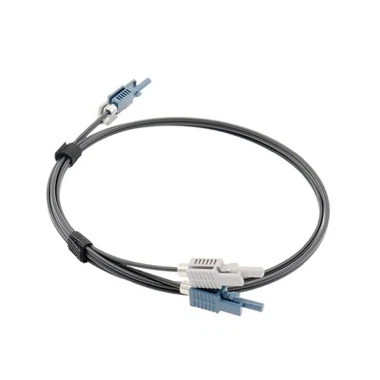
A Medical Fiber Probe Assembly is a specialized fiber optic device designed to deliver or collect light within medical instruments for diagnostic or therapeutic purposes. These probes are used in applications such as endoscopy, laser surgery, photodynamic therapy, and diagnostic imaging.
2. Components of a Medical Fiber Probe Assembly
| Component | Description |
|---|---|
| Optical Fiber Core | Single-mode or multimode fiber that transmits light |
| Fiber Cladding & Coating | Protects the fiber core and maintains optical properties |
| Connector/Interface | Connects probe to light source or detector |
| Probe Tip | Customized end, often with lenses, diffusers, or mirrors for specific light delivery or collection |
| Protective Sheath | Biocompatible, sterilizable covering for patient safety |
| Reinforcement | Strength members or tubing to provide durability and flexibility |
| Cable Assembly | Fiber routing cable with strain relief and medical-grade jacket |
3. Types of Medical Fiber Probes
| Type | Application | Features |
|---|---|---|
| Illumination Probes | Deliver light to surgical or diagnostic sites | Simple fiber with or without lenses |
| Laser Delivery Probes | Precise light delivery for ablation or therapy | Often uses single-mode fibers with focusing tips |
| Imaging Probes | Collect images for endoscopy or OCT | Fiber bundles or coherent fiber arrays |
| Sensing Probes | Measure temperature, pH, oxygen, or biochemical markers | Fiber integrated with sensors |
4. Typical Applications
Endoscopy and Minimally Invasive Surgery
Photodynamic Therapy (PDT)
Laser Surgery and Tissue Ablation
Optical Coherence Tomography (OCT)
Fluorescence Diagnostics
Biomedical Sensing
5. Medical Fiber Probe Assembly Process
Step 1: Fiber Preparation
Strip fiber coating carefully without damaging the glass core.
Clean the fiber with isopropyl alcohol.
Step 2: Fiber Cleaving
Use a high-precision cleaver to ensure a clean, perpendicular fiber endface.
Step 3: Probe Tip Fabrication
Attach lenses, diffusers, or mirrors at the fiber end as required.
Techniques may include polishing, laser micromachining, or adhesive bonding.
Step 4: Fiber Termination and Connectorization
Attach appropriate connectors (e.g., SMA, FC, ST) for light source/detector interface.
Use medical-grade epoxy or mechanical clamps.
Step 5: Protective Sheathing
Encapsulate fiber in biocompatible, sterilizable sheath materials (PTFE, silicone).
Add strain relief components and flexible tubing.
Step 6: Sterilization and Testing
Sterilize probe assembly according to medical standards (e.g., autoclaving, ETO).
Test optical transmission, insertion loss, and mechanical robustness.
6. Important Considerations
| Factor | Description |
|---|---|
| Biocompatibility | Materials must be safe and non-toxic for patient contact |
| Sterilization | Probe must withstand repeated sterilization without damage |
| Flexibility | Probe must navigate anatomy with minimal trauma |
| Durability | Resistance to bending, twisting, and wear in clinical use |
| Optical Performance | Low insertion loss and high signal integrity |
| Size Constraints | Miniaturization for minimally invasive access |
7. Quality Control and Testing
Insertion Loss Measurement to ensure signal strength
Return Loss Measurement to check reflections
Visual Inspection of fiber endface quality
Mechanical Testing: bend radius, tensile strength
Sterilization Validation
8. Common Connector Types in Medical Fiber Probes
SMA 905 / SMA 906: Standard for laser delivery probes
LC / SC Connectors: For diagnostic imaging systems
Custom Miniature Connectors: For integrated handheld devices
9. Summary
Medical fiber probe assemblies combine optical fiber technology with biocompatible materials and precision engineering to enable advanced medical diagnostics and therapies. Proper assembly ensures safety, durability, and optimal optical performance in critical healthcare applications.